


I feel like bread gets forgotten a little at summertime. Like it’s too hot to be kneading, and baking, and even eating a loaf of bread, and I totally get it! But bread doesn’t have to be hot and steamy accompanied by a warming stew, it can be light and tasty accompanied by dips, olives and salad and actually, I feel like those meals are my favourite kind.
Those kinds of meals are exactly what I’ve been putting together in my bread making courses since day one. Firstly, because it’s what I like to eat, and secondly to show that even just one bread made with care can be at the heart of an amazing meal.
This one pictured here is a recreation of what I made at a pitta bread demonstration just the other day. Everything here has been put together with care, and just like I mentioned in the Christmas Canape article, that’s exactly what makes it special. I made the dips, I pickled the vegetables, marinated the olives and feta cheese, in every element on the board there is care and attention, right down to the way it has been placed.
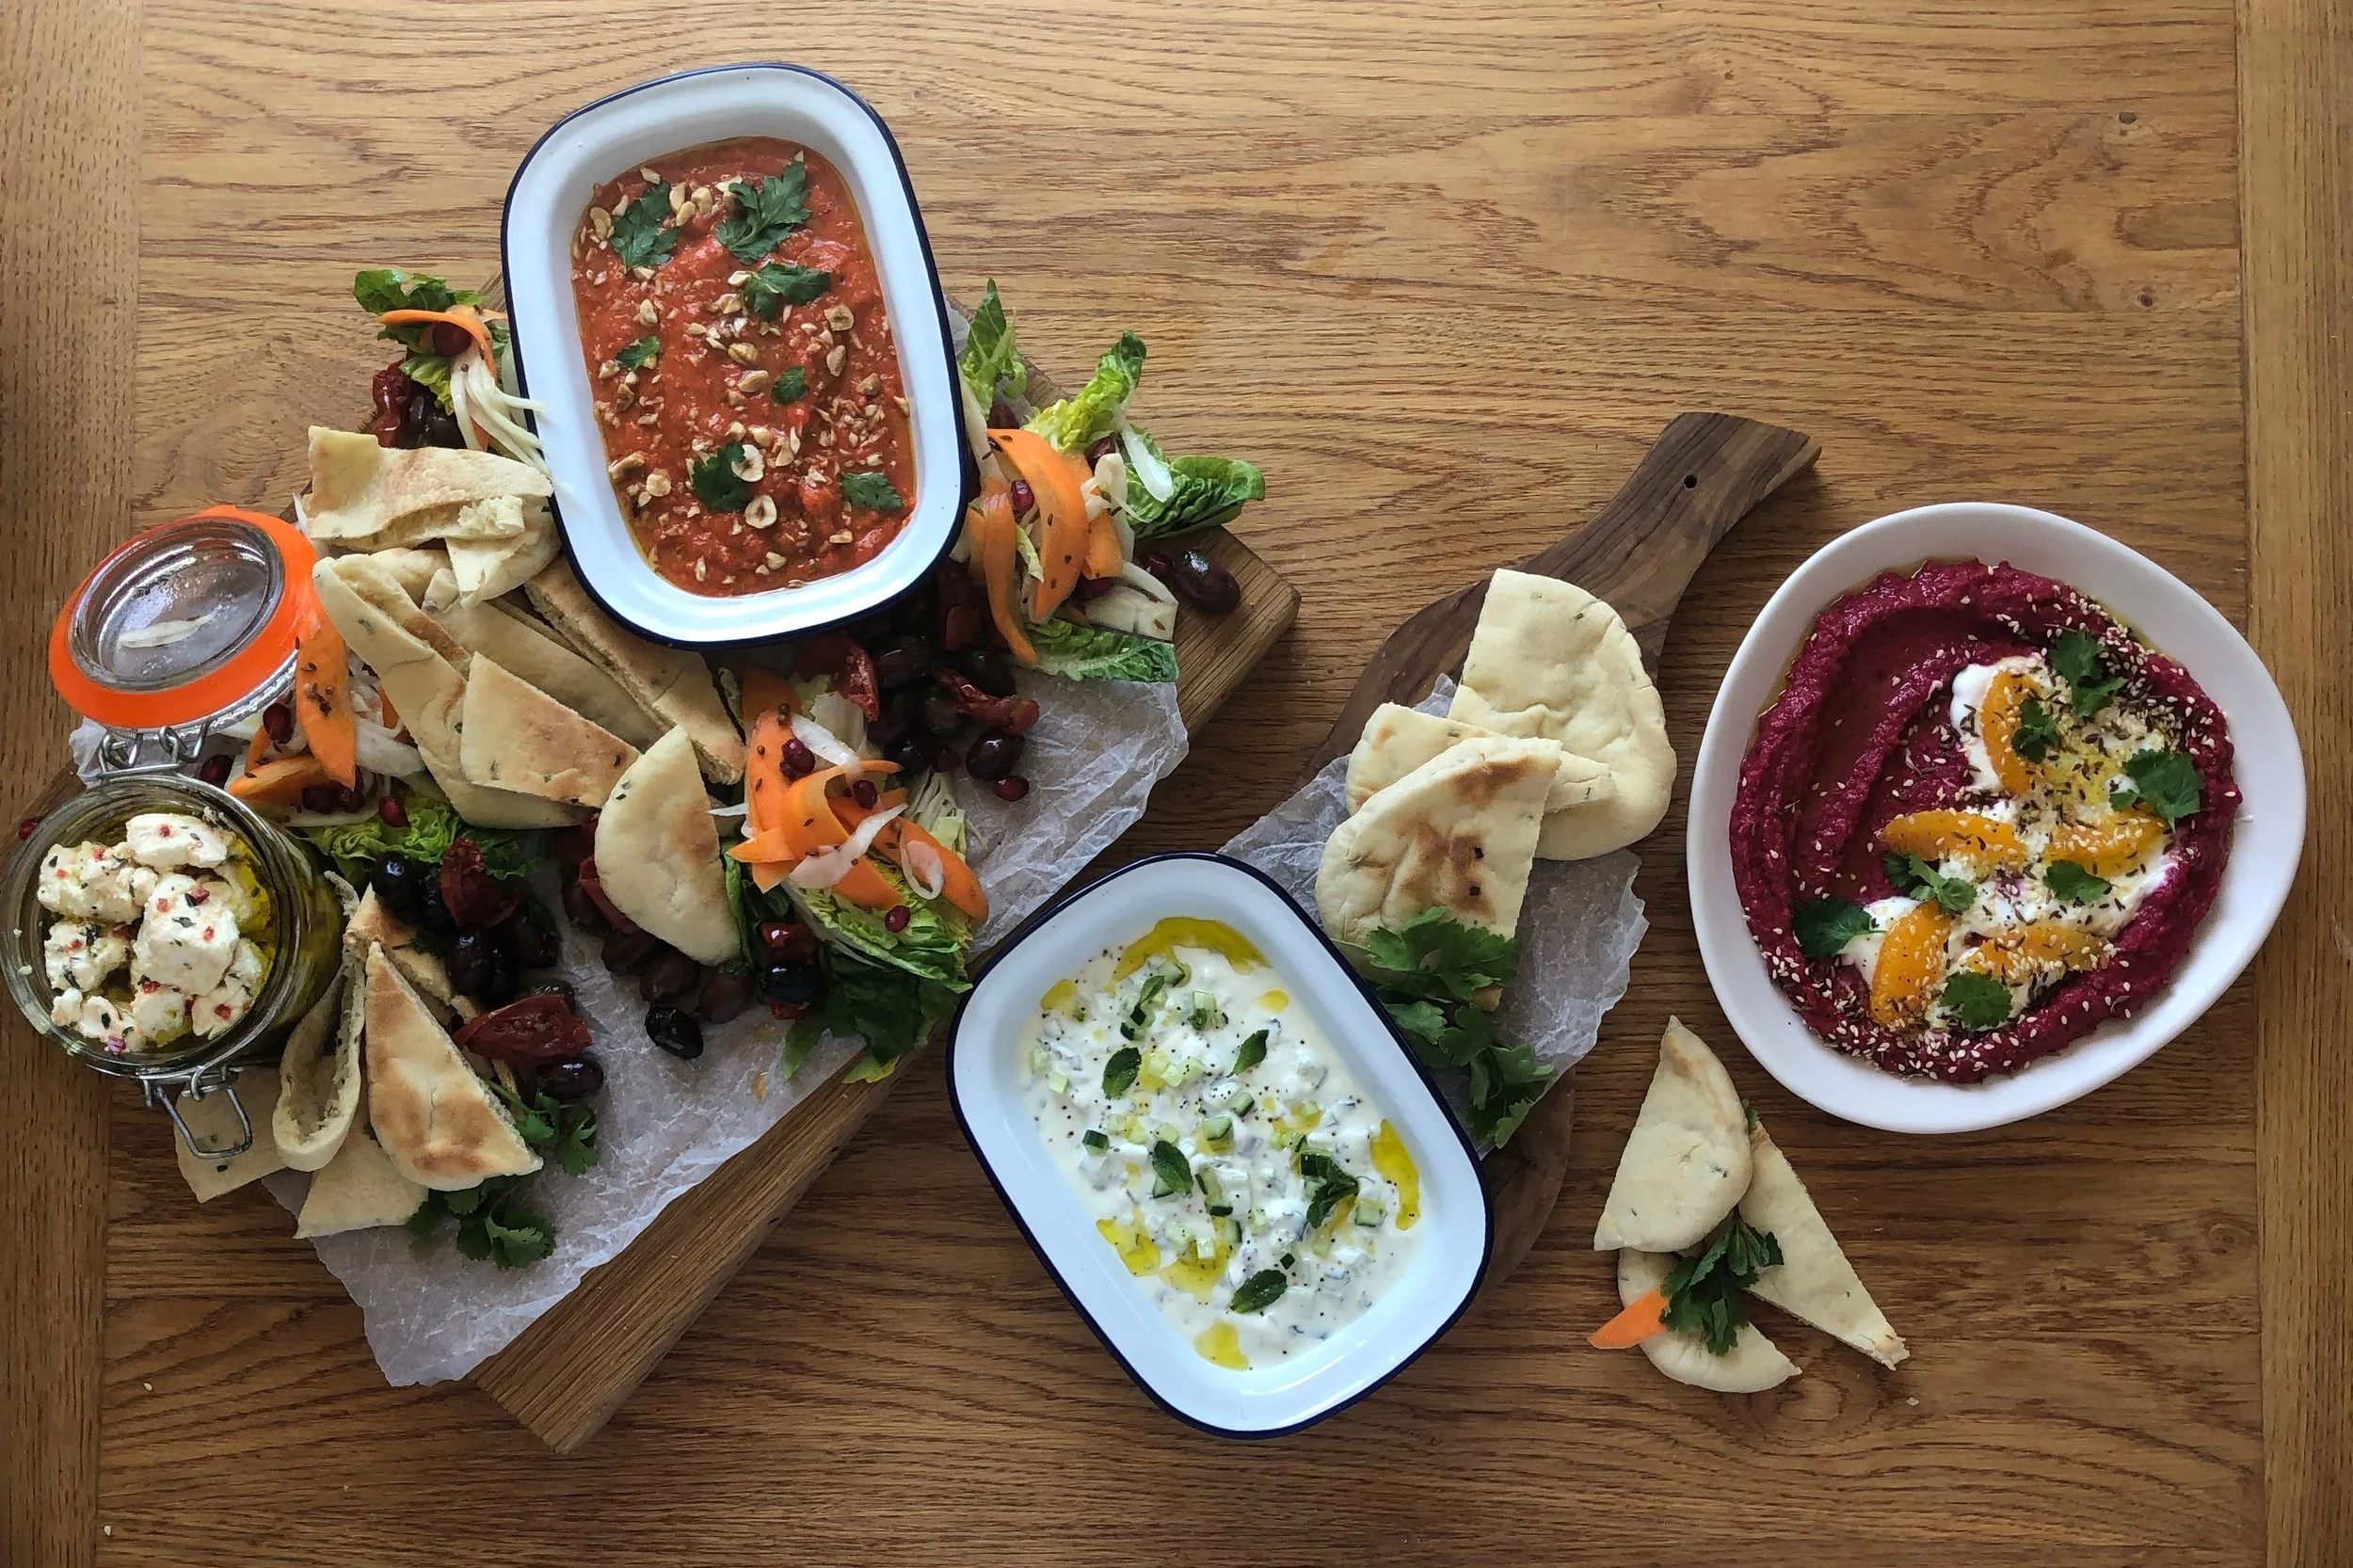
I recreated the whole spread at home so I can break down the recipes for each accompaniment for you if you’d like to make them. The bread doesn’t have to be pitta, that’s just one of the breads from this year’s Summertime Bread Making Workshop, it could be focaccia, or middle eastern spiced flat breads, even simple toasted tortillas will do the trick (homemade of course).
This meal was designed from the very beginning to be super practical and hassle free on serving day. Everything can be made in advance and then when the time comes it’s simply a case of selecting what you’d like to serve it on, and taking your time to build it up with a few cheffy finishing touches.
I’ll put each recipe here and at the bottom of the page you’ll find a few pointers that might be helpful when it comes to putting it all together.
I hope you enjoy it.
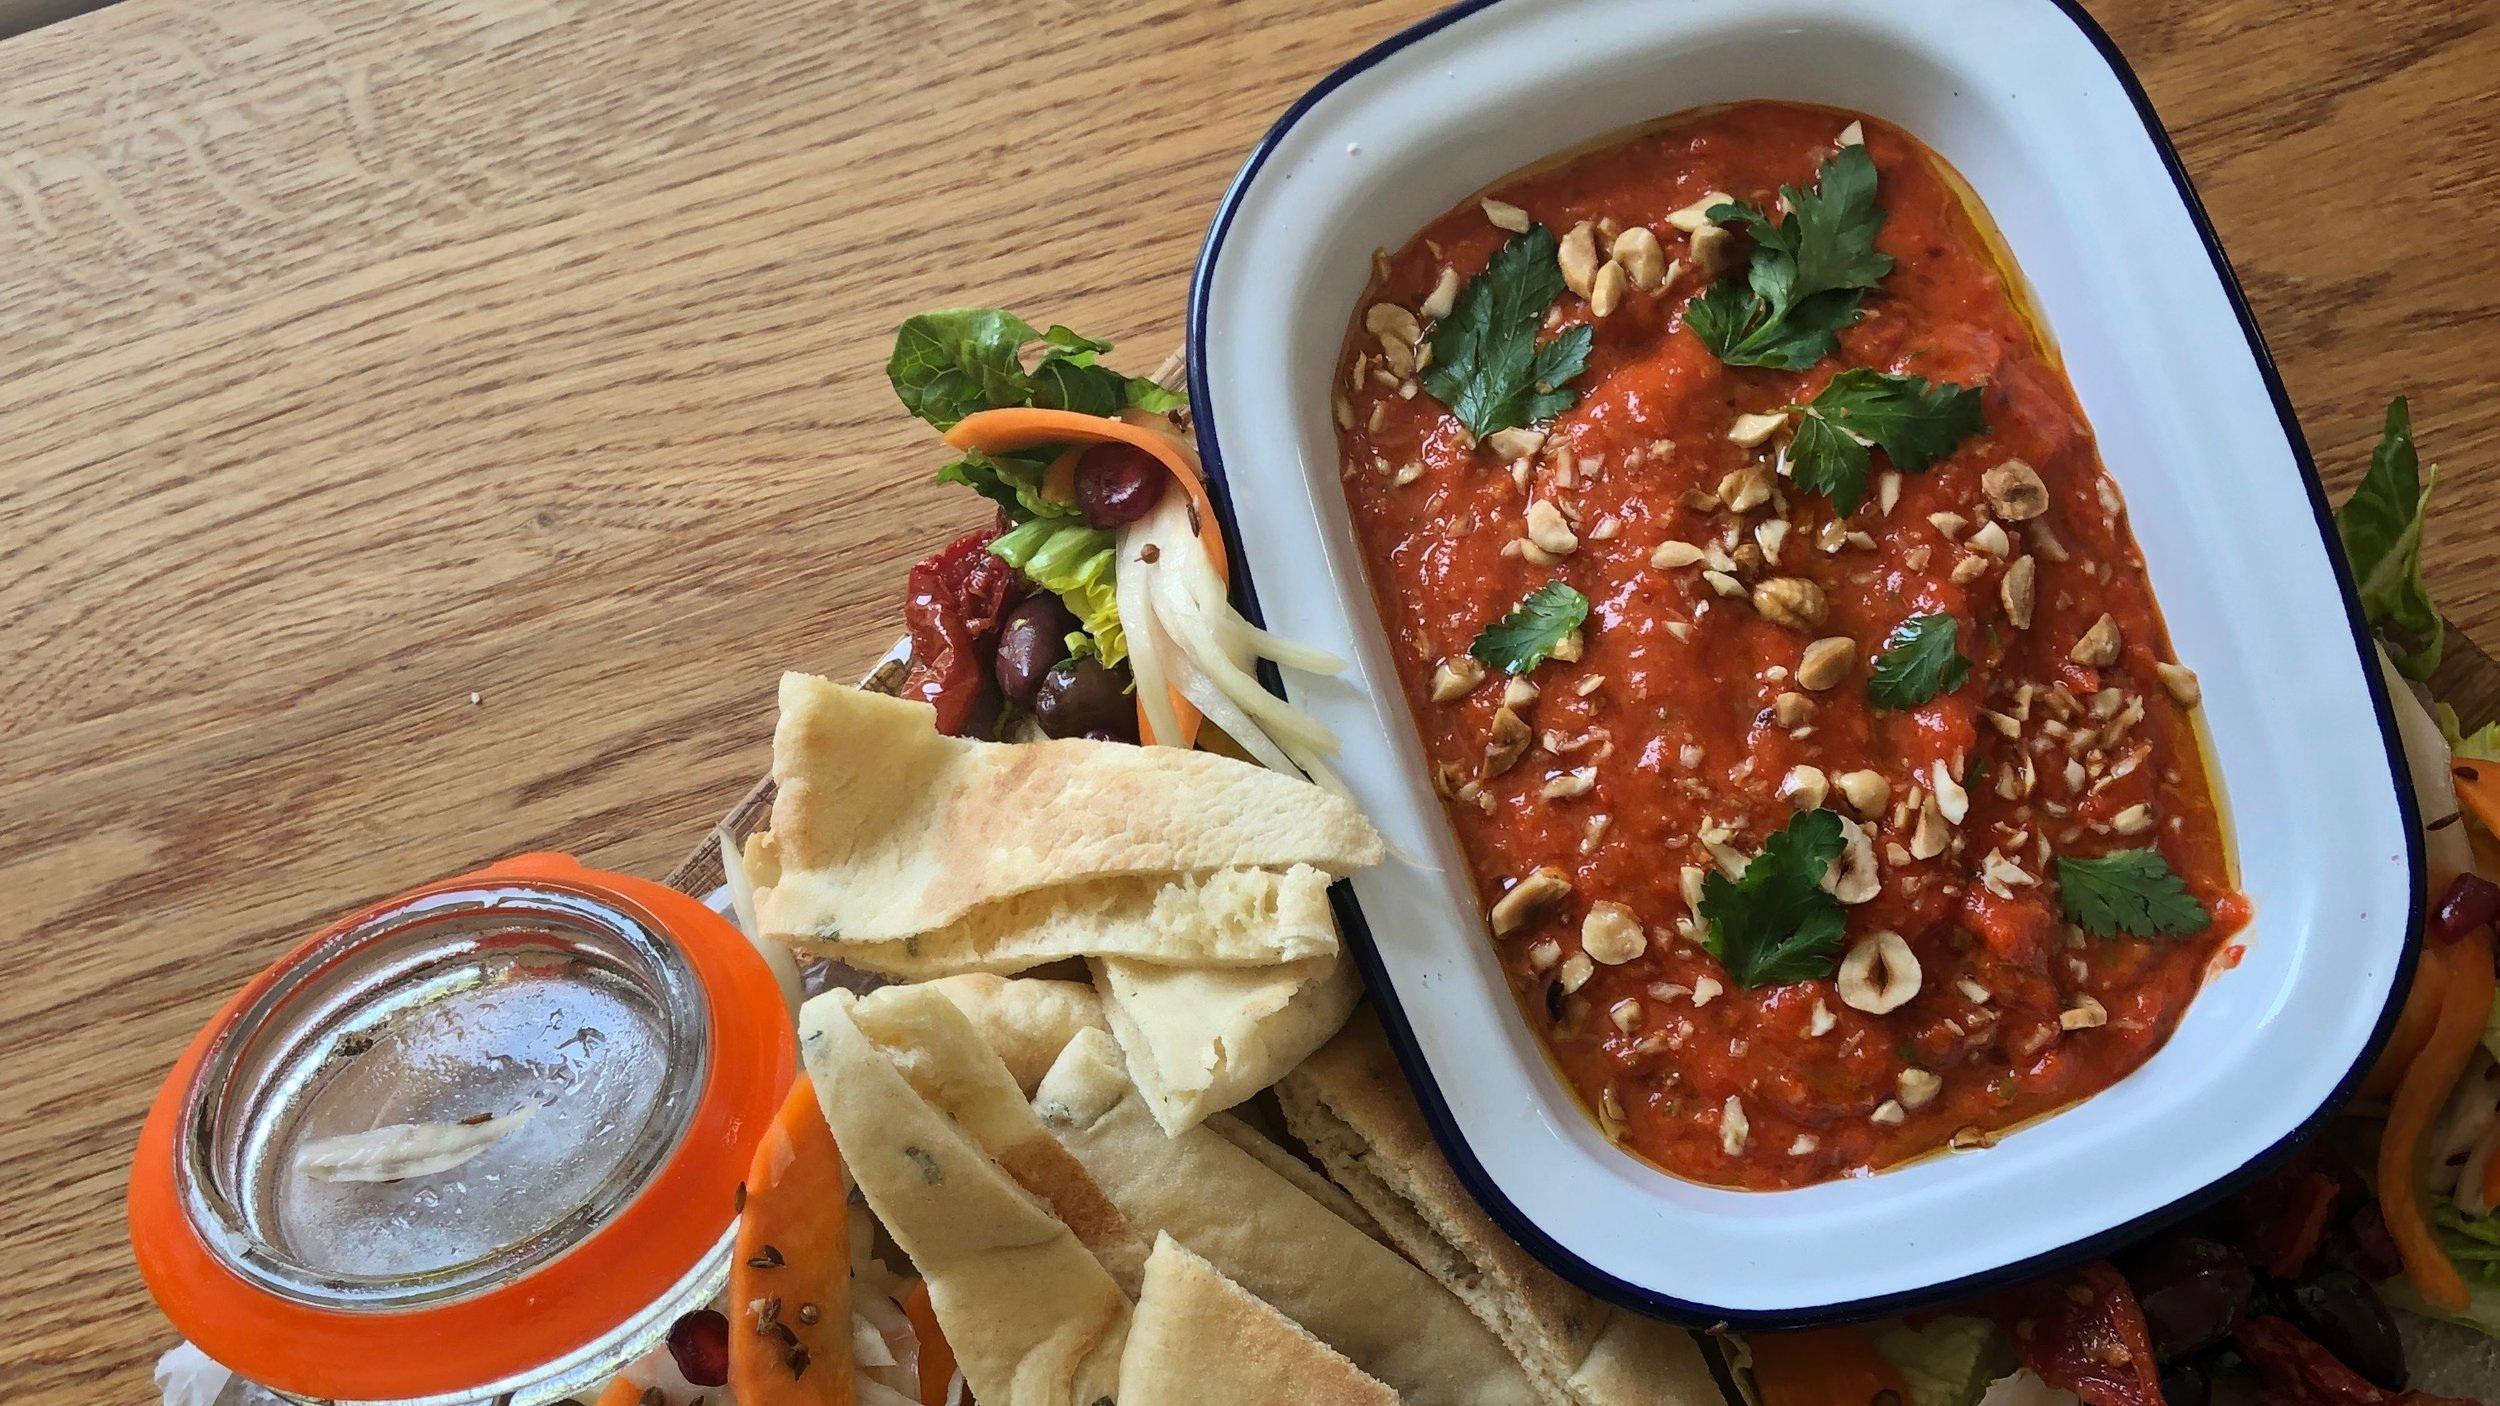
Roasted Hazelnut Romesco
3 Red peppers
4 Plum size tomatoes
4 Peeled garlic cloves
35g Blanched (skin off) hazelnuts
Olive oil
Red wine vinegar
Salt
Parsley
Preheat your oven to 180°C Fan/356°F/Gas Mark 5.
Roughly chop the tomatoes and the flesh from your red peppers and place them in a large mixing bowl with the whole garlic cloves. Toss with enough olive oil to make them shine all over and season with salt. Spread out on a parchment lined tray and roast in the oven for 40 minutes.
TIP: Make sure the garlic is tucked in underneath some of the tomato or pepper so that it roasts up nicely, becoming soft and sweet as apposed to dry and burnt.
While your vegetables are roasting you can roast your hazelnuts. Spread them out on a smaller tray and pop them in the oven too. They will take around 12-15 minutes to get nice and golden.
Tip your nuts into a food processor and process until they are roughly chopped. Add your roasted vegetables and garlic along with two tablespoons of olive oil and one tablespoon of red wine vinegar. Blend to a course consistency. Chop a few sprigs of parsley and stir them through the dip.
Taste the sauce, adjust the seasoning if you need to, and serve. I garnished mine with some picked parsley leaves, a sprinkling of some chopped hazelnuts that I had kept to one side, and drizzle of olive oil.
Notes on texture
I didn’t peel the peppers or tomatoes in this recipe and that’s personal choice because I wanted a rustic textured dip. If you prefer a more refined dip you can remove skins before blending or blend until smooth and pass through a sieve pressing the puree through with the back of a ladle.
Beetroot and Orange Hummus

For the hummus
1 Medium sized fresh beetroot
1 tin of chickpeas, drained
Juice of 1 orange
1 tbsp Tahini paste
2 tbsp Olive Oil
Salt
For the topping
1 tbsp Sesame seeds
1 tbsp Cumin seeds
1 tbsp Caraway seeds
Plain yoghurt
A few orange segments
Fresh coriander leaves
Olive oil
Wrap your beetroot in tin foil and roast it in the oven at 180°C Fan/356°F/Gas Mark 5 for 1 hour. Leave to cool inside the tin foil and you’ll be able to peel off the skin super easily pushing it away with your fingers.
Chop up your beetroot and put into a food processor with the chickpeas, orange juice, tahini, olive oil and a pinch of salt. Blend until you reach your desired consistency.
Taste your hummus and adjust the seasoning if you need to, then set aside.
Put the sesame, cumin and caraway seeds into a cold dry frying pan. Bring the pan up to a medium heat and gently toast the seeds tossing all the time until they release their aromas. Set aside to cool.
If you dress your hummus on a plate as apposed to a pot you have more surface area to sprinkle on your toppings and garnish meaning more flavour! It’s not just because it looks nice on Instagram…
Spread it over the base of a nice plate, dress with yoghurt and then orange segments. Finish with your toasted seed mix, a few coriander leaves and a drizzle of olive oil. Serve.
Minty Tzatziki

10cm Piece of cucumber
½ Clove of garlic
200g Greek Yoghurt
2 tsp Olive oil
½ tsp White wine vinegar
Salt
Slice the cucumber longways into half centimetre slices. Slice longways again into sticks, and then turn to chop into small cubes. Place them into a mixing bowl, finely grate in your garlic and season well with salt. Leave to rest for 30-40 minutes and the salt will draw out the moisture from the cucumber, preventing a watery tzatziki. Tip the water away.
Add all remaining ingredients to the bowl and mix together. Taste and adjust the seasoning before serving.
Mint leaves are the obvious choice for garnishing tzatziki and saving the really tiny ones purely for that purpose might sound silly but makes all the difference. Little cubes of cucumber with the skin on look nice too. I like to finish with a drizzle of olive oil and pinch of cracked black pepper before serving.
Notes on flavour
All of these dips taste better having been made in advance, but this one especially. Once it has rested overnight the garlic really permeates the yoghurt and the mint brings out it’s full favour too.
Finishing Touches…

Pickled Vegetables
Pickled vegetables are a welcome sweet and acidic element to cut through the richness of everything else and also to bring crunch to the otherwise soft bread and silky dips.
Think of subtle and fragrant root vegetables, I went with fennel and carrot, and slice them thinly. Place them in a food bag or container and toss with 100g of white wine vinegar, 65g of caster sugar, a pinch of salt and a teaspoon each of caraway and coriander seeds.
Then cover and put into the fridge for at least two hours to pickle, tossing every once in a while to make sure every bit gets a cover of pickling liquid at some point.
You can keep your pickled vegetables in the fridge for a few days and they will keep their crunch. Drain before serving.

Marinated Olives
Any olives can be marinated or you can, of course, buy them already done for you.
I like to keep my olives au natural and marinate them in whatever I have. For these I used finely grated garlic, chopped parsley and lemon zest all brought together with a little olive oil.
Use your imagination, if you have some fresh chilli and you like the heat then go for it! Chilli, orange zest and thyme would be quite a nice combination, and again, this is one of those things that tastes so much better having prepared them the day before.
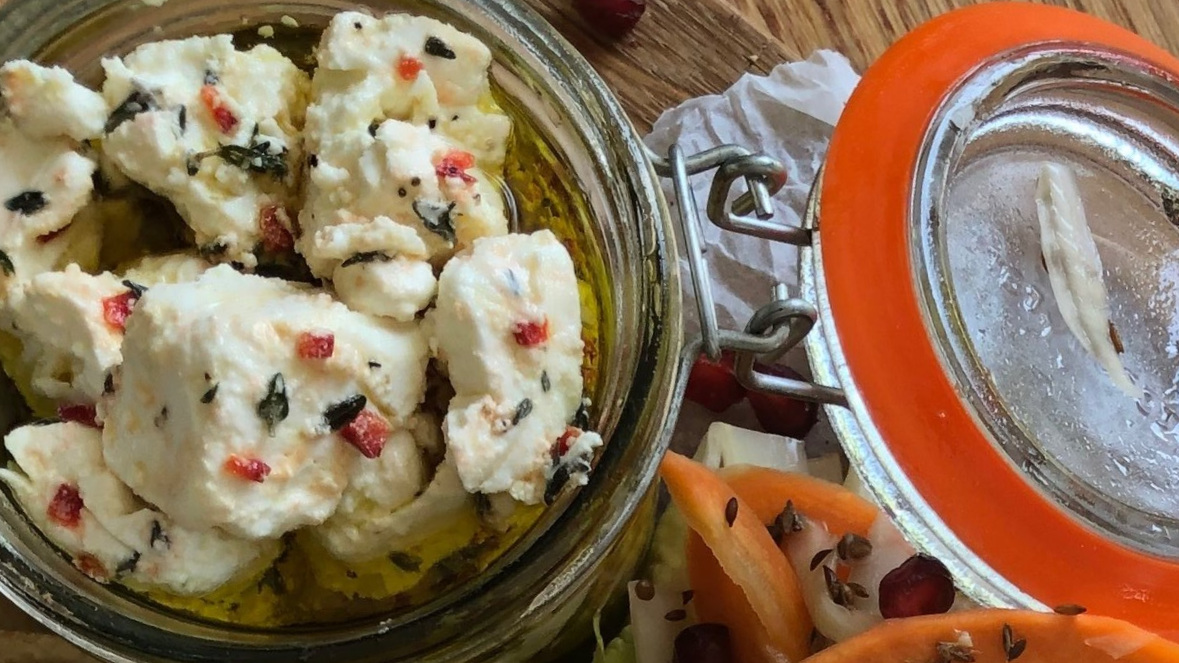
Feta in Olive Oil
This is quite a nice thing to do to jazz up a feta cheese.
Cut your feta into cubes and place in a large mixing bowl. Pick some thyme leaves into the bowl and add some finely chopped red chilli and cracked black pepper. Toss everything together gently, just enough so that every bit of feta has something on it but not so much that the feta is all broken up.
Layer it up snuggly in a clean jar. We are not doing this to preserve the cheese for any length of time, just to introduce a little flavour and so there is no need to sterilise anything. Choose a jar that you like the look of, then top it up with good olive oil. It’ll last happily in the fridge for a week.
I served my feta on the day straight out of the jar. You can use the excess now flavoured oil to dress a salad or roast some potatoes or vegetables.
Leaves and extras
For me a fresh crisp lettuce wins over any mixed leaves on this board. Baby gem lettuce was my choice and I simply sliced a couple into wedges and sprinkled over a few pink pomegranate seeds.
You see, there is a lot going on here. A little effort in every element goes a long way for the final finished spread and effort is always rewarded. That’s what people truly see when they look at dish and say “wow”, whether they know it or not. We can learn so many lessons from this one meal alone, and if you’re prepared to take it on, below are a few pointers and tips you might find useful.
Make it your own
A note on presentation…
When you are building and garnishing food like this take a little time before hand to have a think about what you are going to do. If you like you can do everything exactly like I did, but don’t feel like you have to. As helpful as a suggestion may be, it may often blind you to other possibilities, stifling the creativity that’s already inside of you. As you might have heard me say before, sit down with a pencil. Think, write, sketch and see what you come up with.
When I am garnishing a dish, I think about what I’ve already used in the recipe and use other elements of that to garnish it. For example, the beetroot hummus is freshened up with the juice of an orange and so, I’ve used a few orange segments to garnish bringing colour against the purple of the beetroot and white of the yoghurt. In terms of flavour it works by default because orange is already in the hummus. I could have used the zest of the orange, or some beetroot slices, or crispy toasted chickpeas or whatever. I think you get what I mean, have a play!
Decisions, decisions
Think first, relax later…
Whatever you do decide to do in terms of garnish and presentation, decide nice and early. Like before it’s time to build and dress the food. If you are having guests over for an al fresco lunch the last thing you want to be doing is deciding on what you are doing while you are trying to do it. I’ve learned over the years that things normally take longer than I think they do. If I hadn’t decided early and pre-prepared everything I could, I’d be flustered and then lunch time soon turns into dinner time.
I hope that you enjoyed this post and it’s filled you with ideas to create a great meal around great bread. Bread after all doesn’t have to be just for the chilly months. In fact, as temperature sensitive as bread dough is, in summer here in the UK the weather is on our side. It’s the perfect time to practice your bread making skills, start your bread making journey or learn some new things.
These Sour Cream and Chive Pitta breads are one of the breads on this years Summertime and BBQ Bread Making Workshop.
I hope you got some value out of this post, making bread is not the only thing that I do and there’s so much to be said about everything else that goes with it. I’ve been preparing and cooking food in professional environments since I left school 17 years ago and theres so much I’ve learned from others and from myself along the way that I’m itching to share.
Enjoy the weather that this season brings us and have a great time making, and eating, great food,
Jack :-)